Monday, June 22, 2009

Blackberry Storm

A touch-screen BlackBerry? And no keyboard? Silence, you infidel!” I can almost imagine conversations like these happening in hushed whispers until a few months ago.

To its fiercest advocates, the physical keyboard was the last bastion from which they would shower scorn on the iPhone and its inefficient virtual keyboard. And then Research in Motion’s BlackBerry did the unthinkable — it brewed a Storm (almost) with the launch of the keyboard-less, full touch-screen Storm, where typing and navigating require tapping on glass, much like the iPhone and a slew of devices that were launched in its wake.


From a distance, there’s very little that sets the Storm apart from the increasingly crowded field of touch-based devices. It’s black and has (ho-hum) grey and silver accents. Run-of- the- mill stuff really.It’s about as wide as the iPhone, but the added girth around the waist makes it feel way bigger in your hand.


It’s big, surprisingly heavy and a tad on the clunky side. The weight does make it feel robust, and inspires confidence in its ability to take a licking. Even with four dedicated buttons at the base of the screen, you have to keep both hands free — this is most definitely a two-handed phone.


The size affords the Storm a gorgeous 3.25-in (480 x 360) touchscreen, the biggest and highest resolution screen to come with a BlackBerry model. It’s not as stunning as the Bold but it’s punchy and beautiful, and the BlackBerry OS and video look fantastic on it. Almost like holding a personal media player in your hand.


The capacitive touchscreen is fairly responsive, and here’s where the Storm stands out from the rest of the pack. Unlike the feedback-less iPhone and the haptic (vibration feedback) you get with the Nokia 5800 and the Samsung Omnia, the Storm utilises a completely unique “click” technology called SurePress that actually allows you to click the screen down like a mouse button.


Yes, the whole screen is one large button, and clicking it down is much like clicking a laptop mouse button. So, not only can you hover around the screen without actually selecting anything, there’s also the physical sensation of clicking a button when you type or navigate. It’s very well implemented in the hardware — you won’t accidentally press it when you don’t mean to, but you don’t have to hammer it either.


Now, just how usable is this? To answer that, one has to look at the OS that has been bundled into the Storm. Visually very similar to previous devices from BlackBerry, the Storm features version 4.7 of the OS, where the company has added touch functionality to take the place of trackball movements.


Translated, what this means is that unlike the iPhone, the Storm’s UI is not custom built for touch navigation. It’s almost like they’ve packed in touch navigation as an afterthought. The natural flow that has become now almost legendary on the iPhone — flicking and scrolling, pinching and panning — feel inelegant on the Storm. You’re never really fully in control of device, and the occasional lag you experience when using the phone for any serious use reinforces that fact.

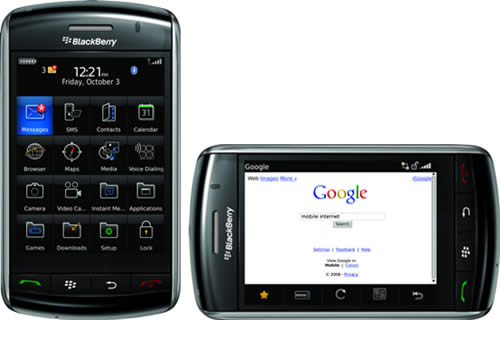
So, to answer the question on everybody’s mind — does this phone have a true BlackBerry soul? It’s a BlackBerry, so yes, the Storm is everything you’d expect from one in the e-mail and security department, and the new Application Center is a step in the right direction. More power to certified third party applications, I say.

But for someone who uses their BlackBerry for a lot of e-mail, this is a serious letdown. I hate to say this, but typing is no fun on this device. Even after a number of days of using the device, pushing the screen in over and over requires so much more effort than simply gliding my fingers around a good touch keyboard.


If you’re in love with the BlackBerry keyboard, this will not do. It is downright tiring, even with the excellent onscreen SureType keyboard taking the smarts out of typing in the right word. And my biggest gripe — no WiFi! On a corporate device, that’s a no-no. On a consumer-oriented device, that’s downright suicidal.


If you’re intent on snapping up the Storm, bear the following in mind. You will need to take your time to get to know the Storm, it’s not an easy transition from the previous Berries.


Once you learn how it likes to be rotated, tapped and swiped, learn the shortcuts, only then can you really start to decide whether or not it’s for you. It’s not the average touchscreen device. Also, accept the fact that you may be sacrificing some amount of efficiency for that gorgeous screen and all that multimedia goodness. As long as you realise the Storm is not the ultimate BlackBerry, and there is no such thing as a one-size-fits-all-device, you’ll love the Storm.


Quick Specs

• Networks: 850/900/1800/1900 MHz, GSM/GPRS networks
• Display: 3.25-in 480 x 360 pixel Transmissive TFT LCD colour display with ambient light sensor
• Data Input/Navigation: SurePress touchscreen, On screen keyboard: portrait SureType and Multi-tap, QWERTY landscape
• Audio: 3.5mm stereo headset capable, A2DP compatible
• Camera: 3.2 MP camera with auto flash, auto focus, 2x digital zoom
• Memory: Expandable memory — Support for microSD card, 1GB onboard memory, 128 MB Flash (flash memory)
• Battery and battery life: 1400 mAhr battery; Standby time: 356 hours, talktime: 6 hours
• Dimensions (H x W x D): 112.5 mm x 62.2 mm x 13.95 mm
• Weight: 155gm
• Rating: 8/10
• Price: Rs 27,990. Available only on Vodafone
•URL:http://www.vodafone.in/existingusers/vbs/pages/blackberry_ind_storm.aspx

Sunday, June 7, 2009

Shop Safe Online & Paypal

You’ve stumbled upon a rare edition of Tolkien’s The Hobbit on eBay and, the bibliophile that you are, you know you must grab it before anyone else does. The only hitch is that you are too scared to use your credit card on the Internet.


On a travel site, you have found the perfect deal for your summer holiday and you know you won’t get a better one at the ticket counter. The only way you can book is online. And for that you need a credit card, something you don’t have.


There are people who persistently refuse to make online transactions, like our friend the bibliophile, because they fear their credit card number will be stolen. There are others who simply don’t believe in plastic.


The fear of your credit card number being stolen is not mere paranoia. There have been many instances of such online theft. This usually happens either because the computer user is using a pirated version of Windows, or he does not have adequate protection in the form of an Internet Security suite that protects him from viruses and online thieves. However, those of you who choose not to use a credit card in your daily life need not shy away from using one in the virtual world!


Just create a virtual credit card. It is both secure and easy. You can then use your virtual card number to buy anything online easily and without any fear. The best part is that you can fix a credit limit also.


To create a virtual card you need either a MasterCard or Visa credit card from your bank. You could even use your debit card. And you must be Internet banking enabled.


Creating a virtual credit card involves a simple three-step process. Go to your bank’s Internet site. See if it has the option for creating a virtual credit card. HDFC Bank has and it is called NetSafe. All it requires is a one-time registration. After that you can log in and generate any number of these temporary credit cards.


First you need to accept the terms and conditions (please read them carefully). Next key in your debit card number and your ATM PIN. If you are using a credit card you have to insert the three-digit number printed in the signature space on the back of most credit cards. It is called the CVV or Card Verification Value. On American Express Cards it is a four-digit code. Your date of birth and the date of expiry of your card also need to be filled in. Fill in your personal details and create a username and password of your choice. This completes the registration process and now you can log in to NetSafe.


Finally, you need to specify the account from which the money is to be debited, and the credit limit. That’s it. Your virtual credit card will contain your card limit, your unique one-time card number and finally the CVV.


The card lapses on use, thus preventing any theft. You must use your card within 24 hours of creating it. If you want to make more purchases online just make another virtual credit card by logging in to your NetSafe account.


Receiving payments

We have talked about buying securely using a virtual credit card. But what if you want receive payment for work done? For this PayPal is a very good option. Open an account by signing up in www.paypal.com. Link your virtual card to this account. Once your account is ready you can even make payments through PayPal.


A basic PayPal account is free. You can send funds to anyone with an e-mail address, whether they have a PayPal account or not. They’ll get a message from PayPal about the funds, and then they just have to sign up for their own account.


Funds transferred via PayPal reside in a PayPal account until the holder of the funds retrieves them or spends them. If the user has entered and verified the bank account information, the funds can be transferred directly into their account. For the money to be transferred to your bank account you will need the MICR code to identify your bank branch. You can get this information from the Reserve Bank of India (RBI) website. Just search for “RBI micr number” and the first result will get you the relevant code.


To Get Yourself A Business Paypal Account and start accepting credit cards click on the image below.

No start-up or monthly fees, no cancellation fees, and no minimum payments.
Just Sign up and get started in minutes.


Sign up for PayPal and start accepting credit card payments instantly.


Online chess game


Friday, June 5, 2009

When Windows Don't Load


One of the major problems faced by all PC users is when Windows simply refuses to load. Try as you might, in Safe Mode or Normal Mode, the PC will just not respond. You can keep pressing the computer’s switch till your fingers turn sore, but it stays dead.


Your vendor will probably tell you to format the hard drive and reload Windows. But this is easier said than done. You may think your precious pictures, programs and songs, not to talk about the important documents, are lost forever. This is when you need a bootable CD to kick start your computer and deal with the problem.


Ideally, a recovery disc should act as a safety net if anything bad happens to you

r PC’s hard drive or its data. This can occur because of a program crash, a virus or spyware attack, or even from a corrupt driver. A good recovery disc allows you to reinstall Windows to fix a minor problem without having to format the hard drive.


But there is a hitch in making a bootable Windows CD with the latest drivers and patches. Once you upgrade your Windows XP to Service Pack 3, the operating system will never allow you to install an older version (includin

g earlier editions of XP) without wiping the hard drive. The solution is to create a new installation disc from your Windows installer CD and a special version of SP3, using a process known as slipstreaming.


Before you begin creating a bootable CD make sure you have three things: a genuine XP CD, a valid Windows product key, and about 1.5 GB of free space on

your hard drive. Your Windows XP CD can be SP1 or SP2 or even the original release from 2001.

Now let us begin the process of creating a bootable Windows CD. First make a new folder called XPSetup in the C:\ of your hard drive. Insert your original XP CD, start Windows Explorer, and then navigate to your CD drive. Highlight everything in the root folder of the CD, and copy all of it to the C:\XPSetup folder you just made.


Next, create a second new folder in C:\ and name it SP3. Go to http://www.microsoft.com/downloads /Results.aspx?displaylang=en&nr=50 and click the link for Windows XP Service Pack 3 Network Installation Package for IT Professionals and Developers. Download the 324MB file, WindowsXP-KB936929-SP3-x86-ENU.exe, and save it to the new C:\SP3 folder.


From the Start menu, select Run and type the following command at the prompt C:\SP3\WindowsXP-KB936929-SP3-x86-ENU /integrate:C:\XPSetup. Make sure there is only a single space between ENU and /integrate — there should be no other spaces. Otherwise, you will get all kinds of error messages. If everything is done right you should get a “Completed” message box after a while. On some computers this process takes several minutes to complete.


Now we will create what is called

an “answer file” to enter your product key automatically so that you do not have to type it manually later on. On your original Win XP CD (Professional Edition only), navigate to the \Support\Tools folder, double-click Deploy.cab, and then double-click Setupmgr.exe to open the Windows Setup Manager Wizard. When prompted, choose Create a new answer file and then Windows Unattended Installation. For the User Interaction Level, choose Provide Defaults, and when asked about the Distribution Folder, answer No. Finally, you’ll see a new window, into which you can specify defaults; select Providing the Product Key on the left and then type your product key in the text fields on the right. When you’re done, save the file Unattend.txt into your C:\XPSetup folder.


The final step has yet to be done. You have to extract the boot loader from your old Windows XP disc so that you can make the new one bootable. The best way to do this is to download a free software called ImgBurn from www.imgburn.com.


Install ImgBurn, start the program, and click Write files/folders to disc on the first screen. Choose the Advanced tab, followed by the Bootable Disc tab, and from the Extract Boot Image list select the drive containing your XP disc. Click the Save icon and save the BootImage.ima file to your C:\SP3 folder. Now all that you have to do is burn a new CD.


In ImgBurn, choose the Advanced tab, followed by the Bootable Disc tab, and turn on the Make Image Bootable option. If prompted to choose a bootable disc emulation type, select no emulation. (Use 0x7C0 for the load segment, and 4 for the sector count. Make sure you are using the Joliet file system). Specify the BootImage.ima file you just created as the boot image; drag the entire contents of the C:\XPSetup folder into your CD project and burn the CD.


Keep this disk in a safe place. The next time your Windows does not load use it so that your computer recovers.


galaxy y duos lite

The usp of the phone is 4 GB internal memory. Its lot faster than 4GB card can be. And most importantly whopping 1GB space for android ap...